
![]() Wed Aug 04, 2010 4:49 am
Wed Aug 04, 2010 4:49 am
Signature Tutorial
Step 1 :: Open up photoshop and create a new document like this
one:

______________________________
Step 2 :: Highlight "layer 1" in the layers palette and click on
Filter>Render>Clouds. Now you should have something like this:
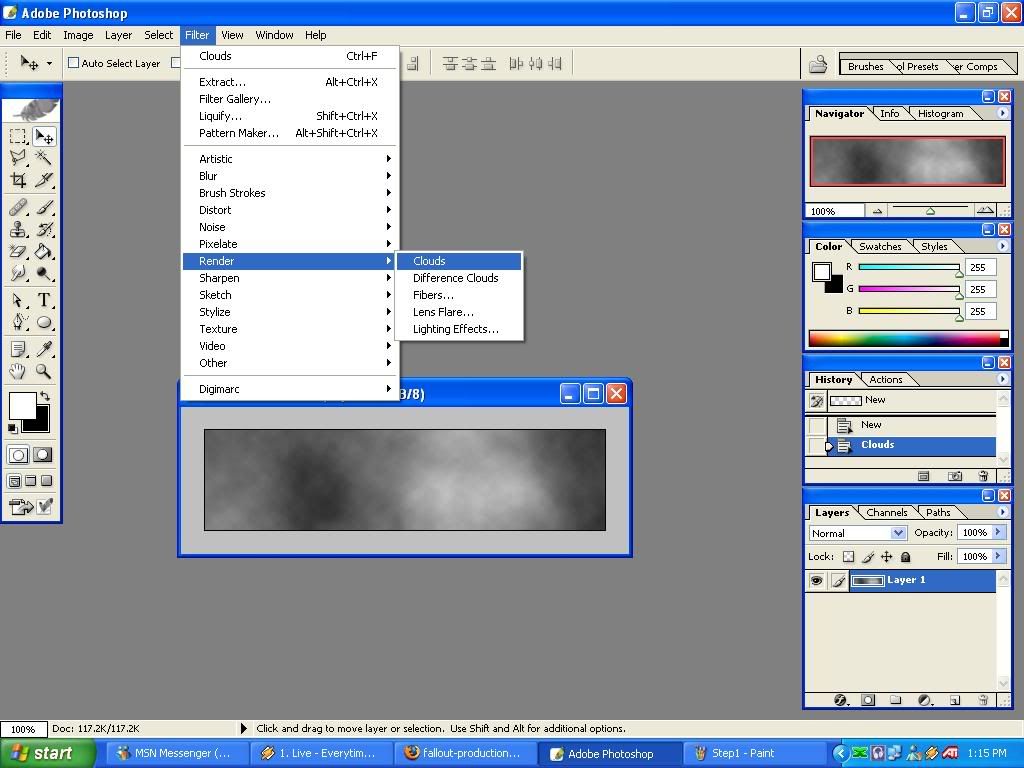
______________________________
Step 3 :: Create a new layer by clicking "CTRL+SHIFT+N". Open up
a grunge brush pack
[This] one is
good. Now just brush around on the background until you get your
desired result. I came up with this:
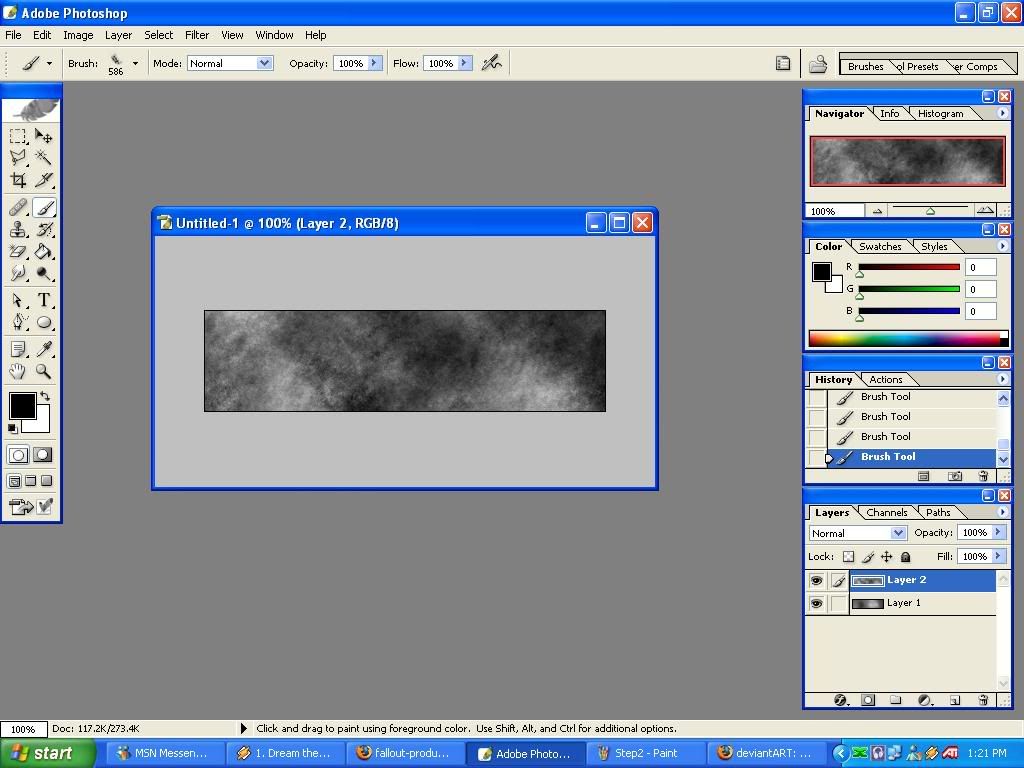
______________________________
Step 4 :: Now we want to add our Render (or picture). So go
[Here] and just take one of the
free ones. Now up it up in Photoshop.
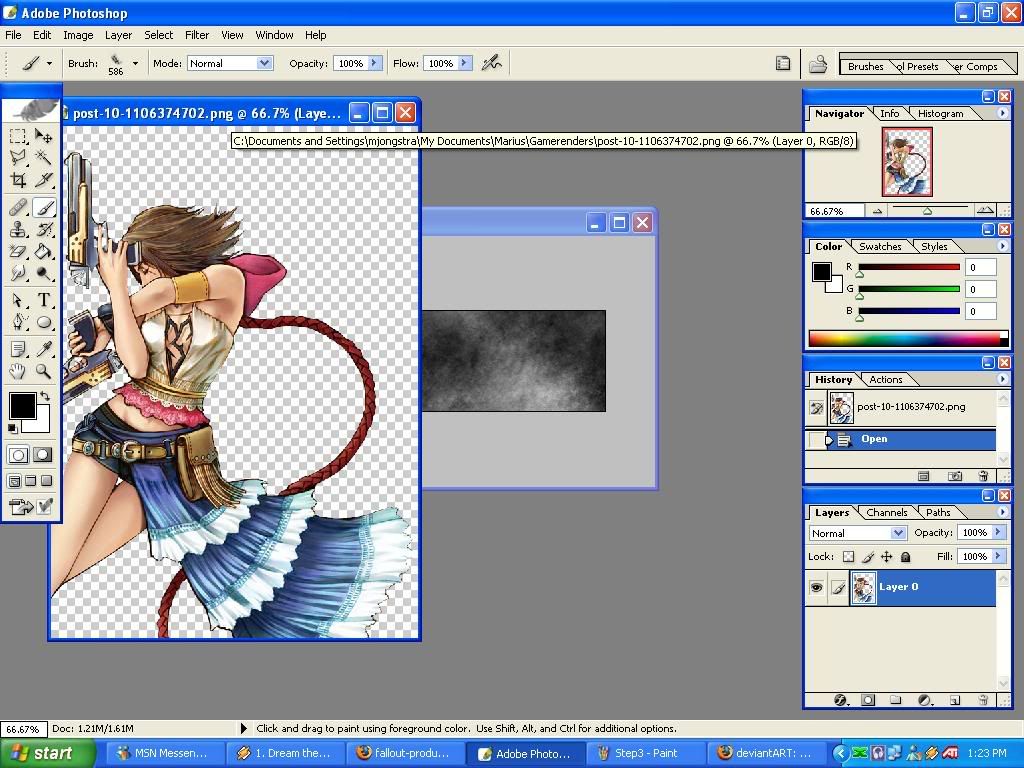
______________________________
Step 5 :: Now we want to drag the render to the signature. So
take the move too (Circled in red) and then just click and drag on the
the signature document.
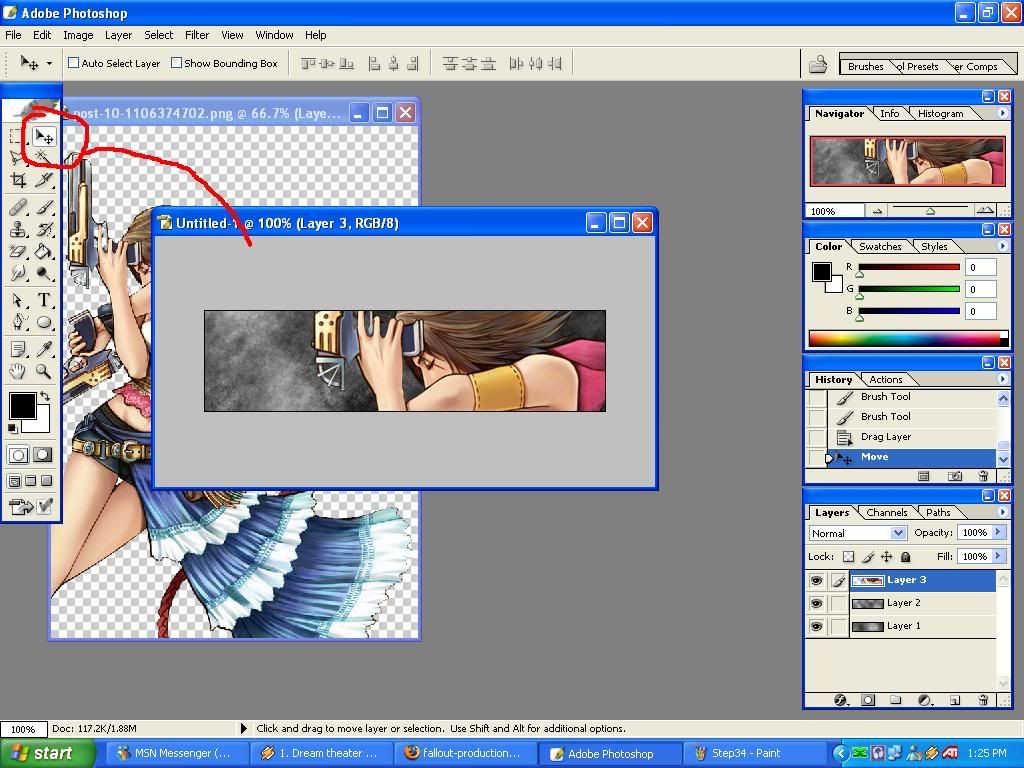
______________________________
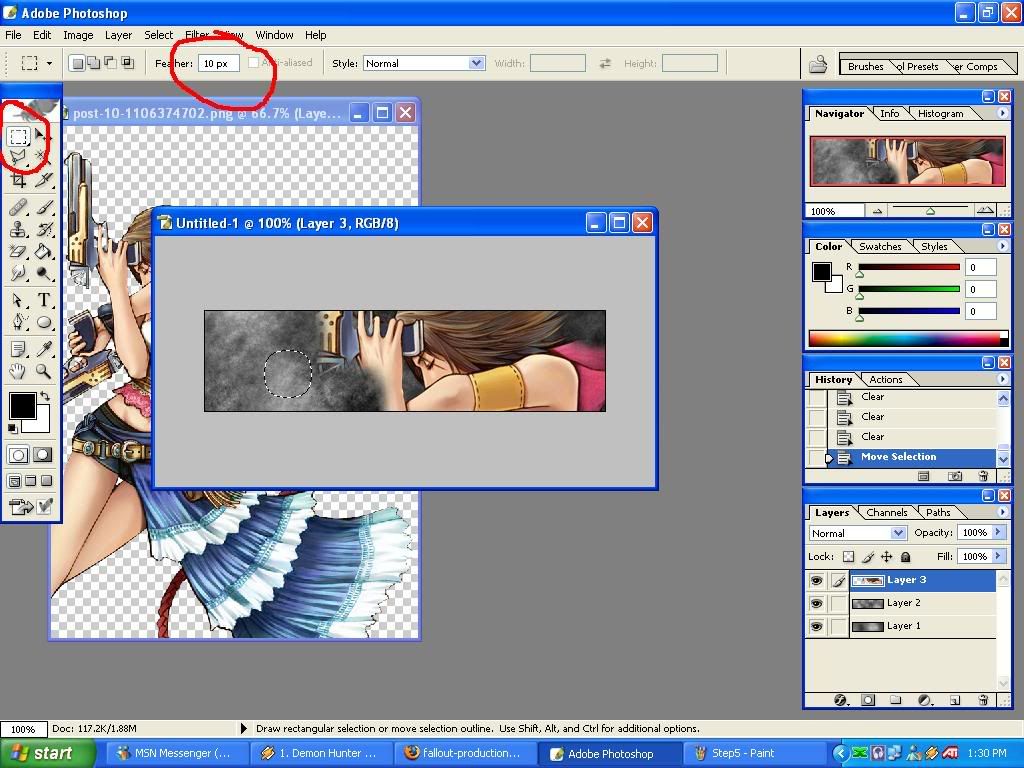
Step 6 :: Now its time to blend the render. Take your
Rectangular Marquee
Tool (Circled in Red). And at the top toolbar change the feather to
10px. Now while holding shift make a small box next to the render and
any other places you want to blend in and then press Delete on your
keyboard. And you should get the following:
______________________________
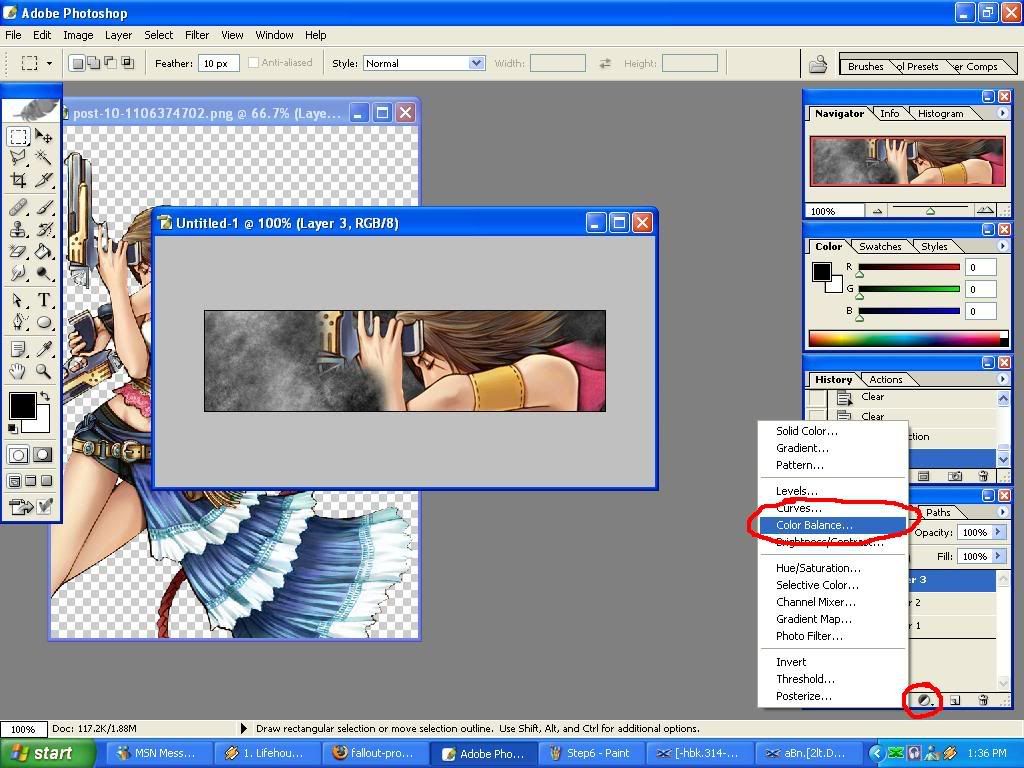
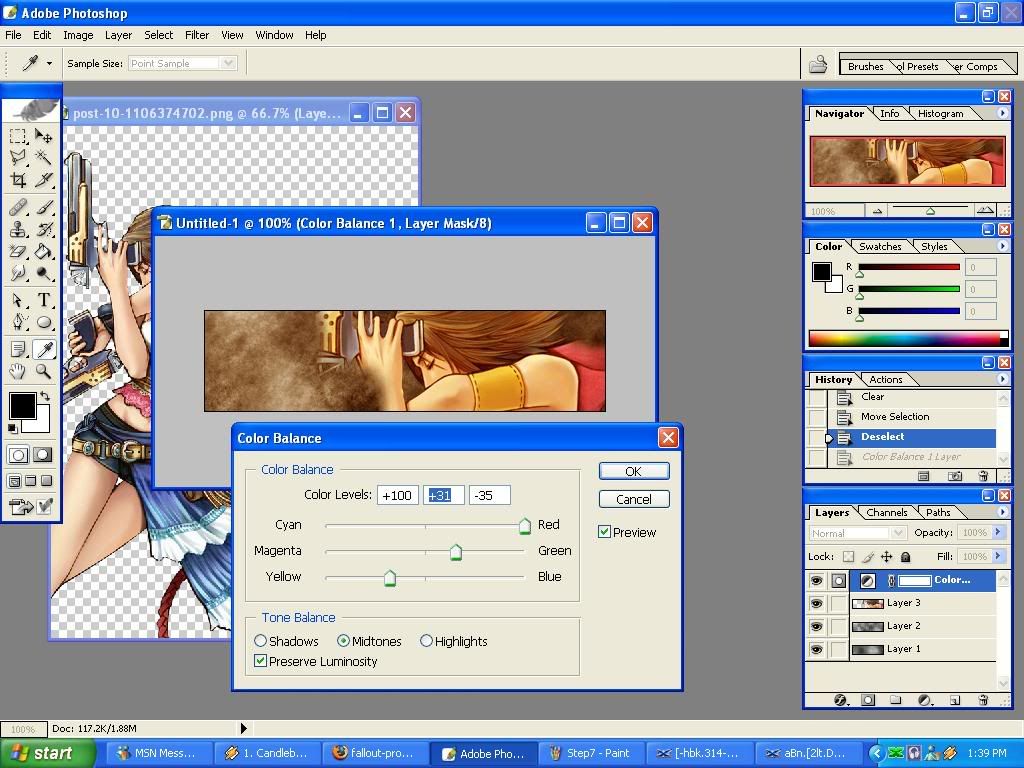
Step 7 :: Now time to add some color to your Sig. Click the the
little
circle thats half white and half black (Circled in red) and then click
on Color Balance.
______________________________
Step 8 :: Now A little screen should pop up and enter the
following settings and press ok.
______________________________
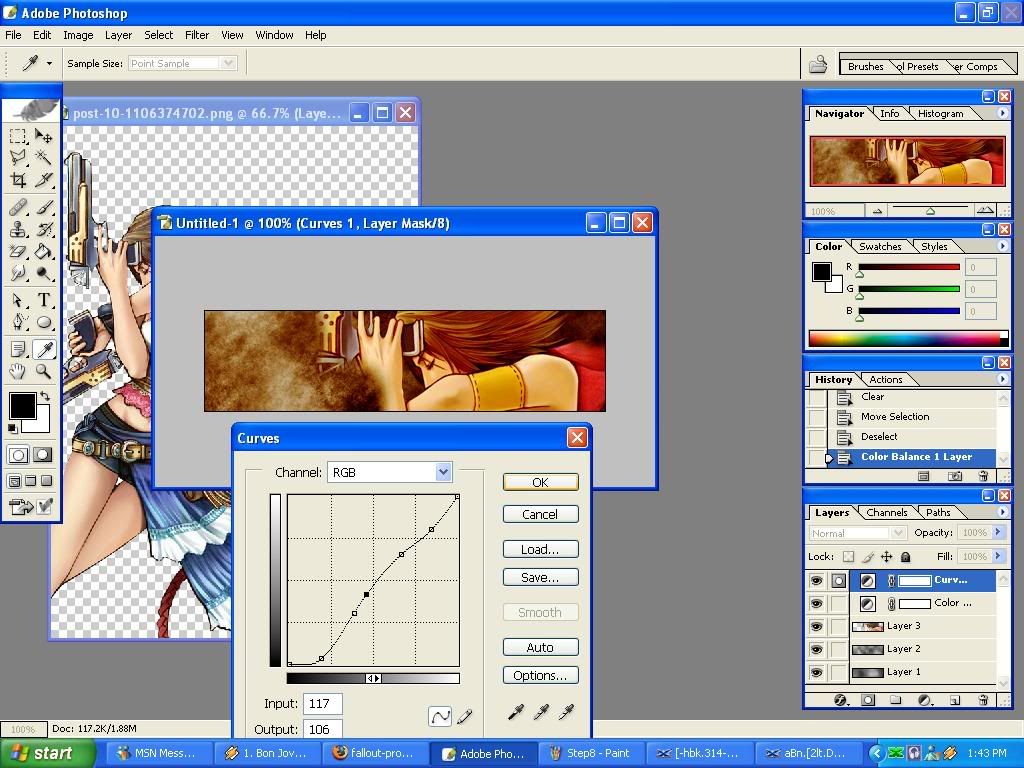
Step 9 :: Now you have some color. not its time to add some
light and add
some depth to your background. Again click the half white and half
black circle (Refer to step7 picture to see where it is) and then click
Curves. Just fiddle around with it till you get something like mine or
till your desired settings.
______________________________
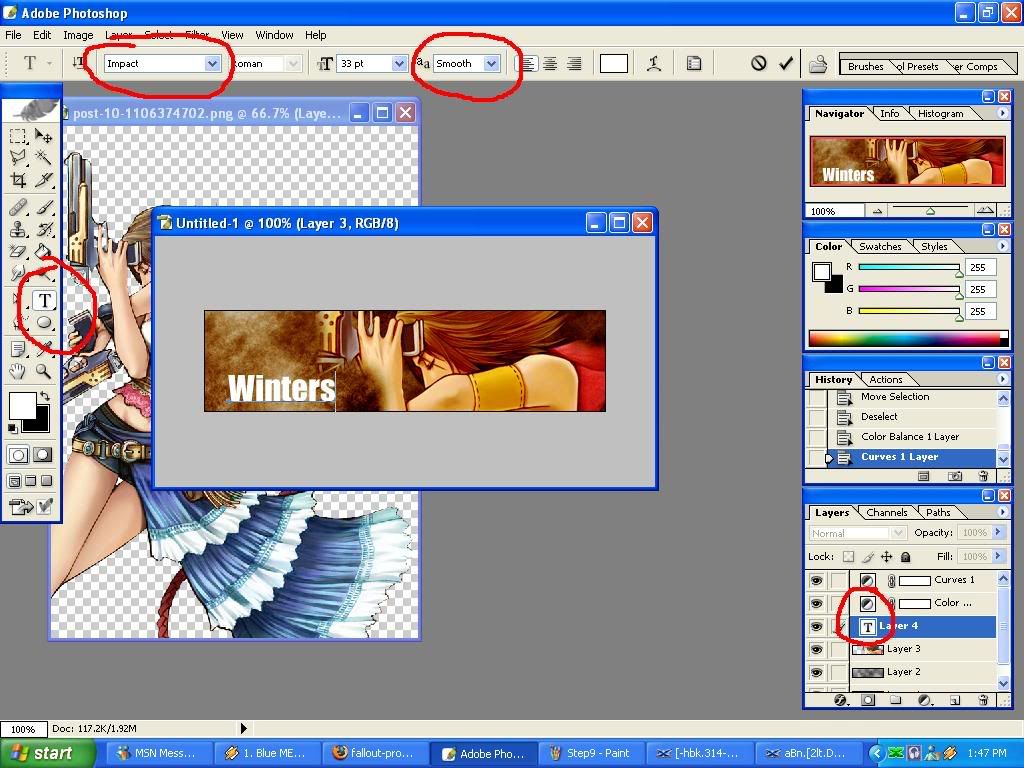
Step10 :: Now that our Background is done, its time to add our
text.
Click the text tool (Circled in red) and choose a text. I will be using
"Impact". Make sure that the color is white though, if it's black then
it wont work very well. Also make sure that the text layer is
underneath the color balance layer. Also set your AA (anti-ailiasing)
to smooth. Now write your text.
______________________________
Step 11 :: Now to add the text effects. Click the little '
f ' at the bottom (circled in red) and then click drop shadow,
and use the following settings:
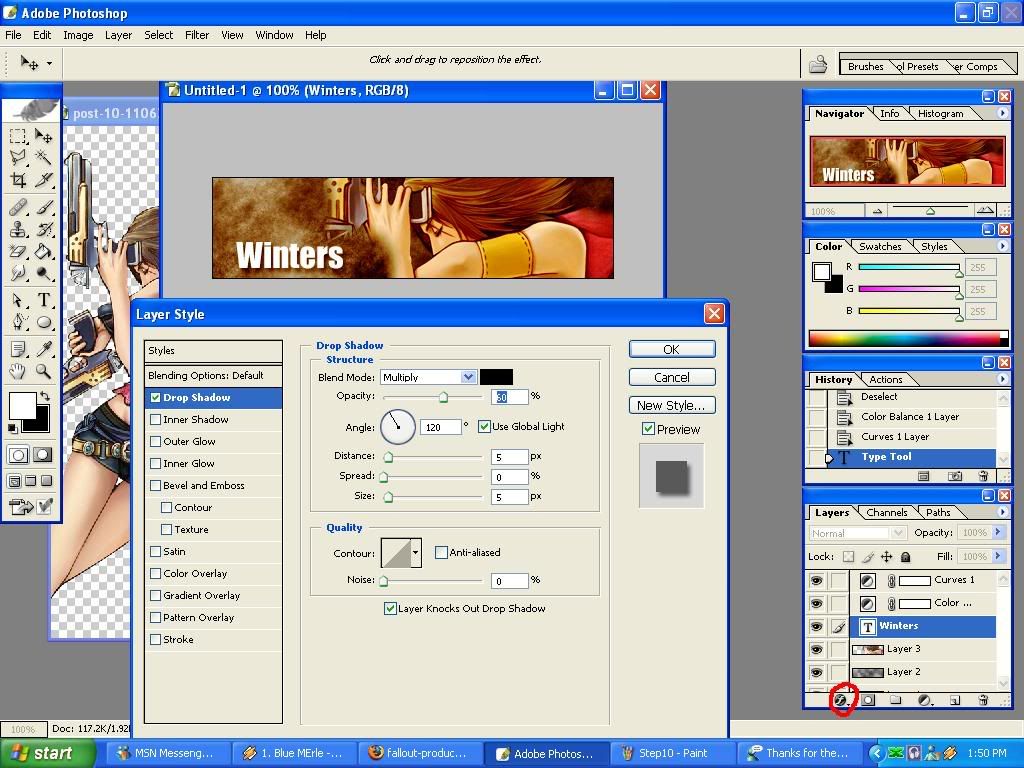
______________________________
Step 12 :: Repeat step 11, but instead of drop shadow, use inner
shadow. Use the following:

______________________________
Step 13 :: Now for Bevel and Emboss, Use the following settings:
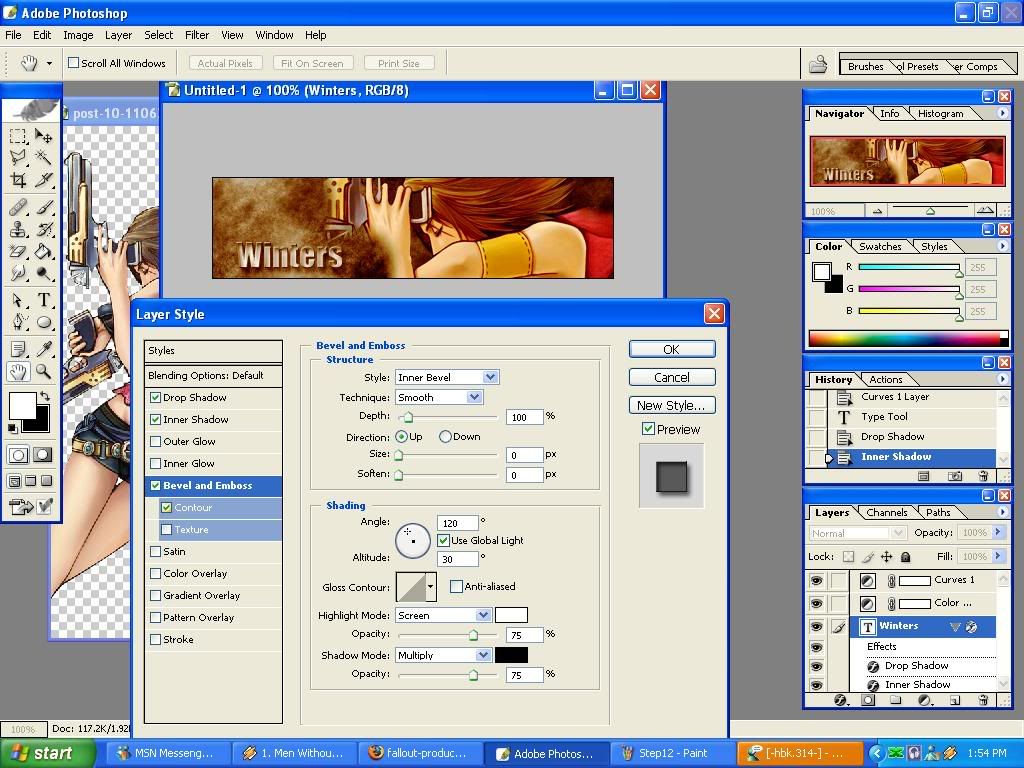
______________________________
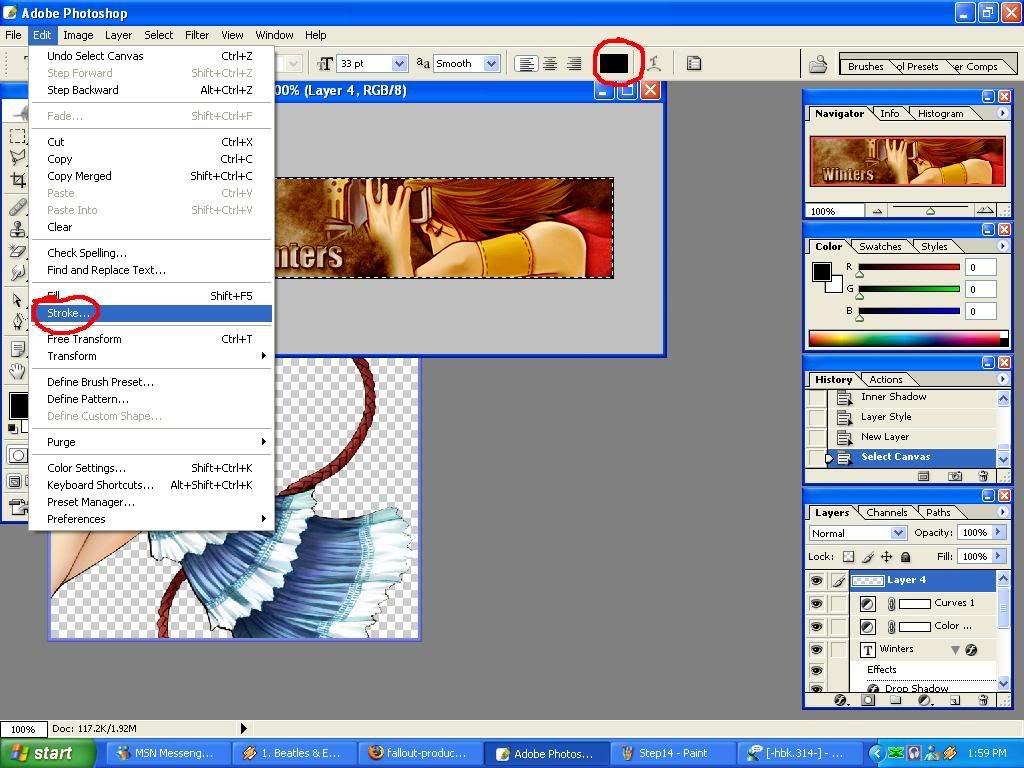
Step 14 :: Now for Stroke. Use the following Settings:
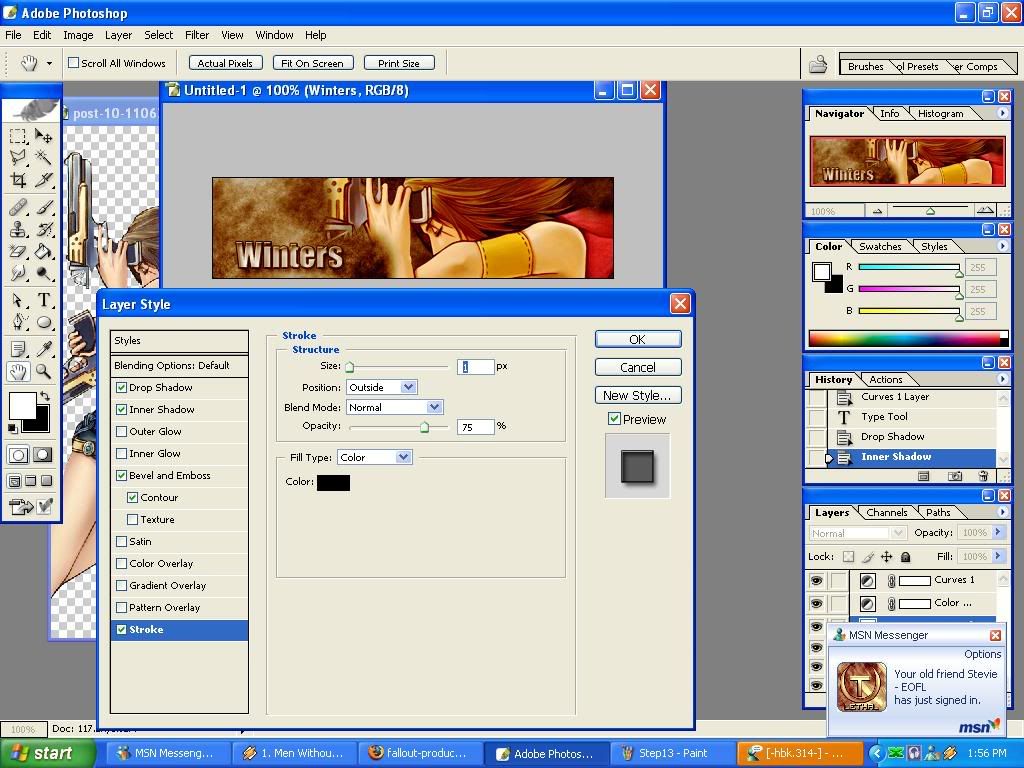
______________________________
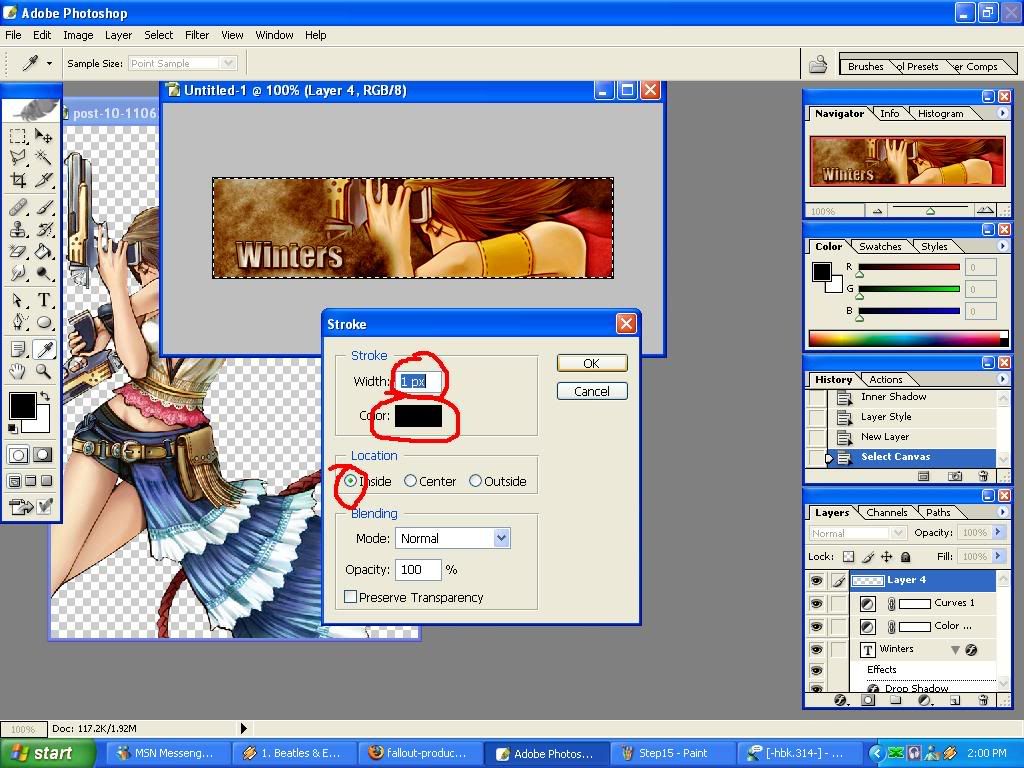
Step 15 :: Ok now the text and Background is done, so just to
finish up
the sig, we will put on a simple 1px border. Create a new layer and
then press "CTRL+A" To select it all, and then go edit>stroke:
Now when the little window comes up use the following settings:
______________________________
Now your done, Here should be your final result:

=============================
Tutorial brought to you by: Winters @ Pixel2LifeBasic
=============================
Tutorial brought to you by: Winters @ Pixel2LifeBasic
=============================


